前提条件
TDD が初めての方は先に @t_wadaさんの動画を見ていただき、TDD の感覚を掴んでもらうことをお勧めします。また、以下のような技術スタックで開発経験のある方を想定しています。
- React Hooks と TypeScript を用いたコンポーネント開発
- Jest と React Testing Library を用いた UI テスト
アプリの題材
TDD に集中するため、以前に作ったことのある TODO アプリを題材にします。実装の詳細には触れませんのでご了承ください。完成形はこのようになります。
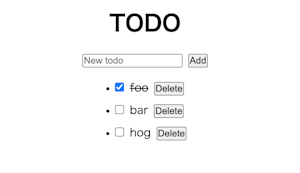
⚠️ 記事内ではアプリ作成の途中までを扱います。
アプリの仕様を考える
アプリの要件を仕様として箇条書きにします。あくまで実装前で思いつくものであり、完璧である必要はありません。TDD には設計を考えさせるという大きなメリットがあるため、現時点で思いつく仕様には往々にして追加や変更が入ります。
TODO アプリの仕様

- 初期化
  - todo を追加するためのテキストボックスとボタンを表示する。
  - エンプティステートを表示する。
- todo の追加
  - 入力された文字列をテキストボックスに表示する。
  - Add ボタンが押されたら、todo をリストの最後に追加する。
  - テキストボックスが空の状態で Add ボタンが押されたら、アラートを表示する。
- todo の削除
  - Delete ボタンが押された todo を削除する。
- todo の更新
  - 未完了の todo のチェックボックスが押されたら、そのチェックボックスのチェックを入れる。
  - 完了済みの todo のチェックボックスが押されたら、そのチェックボックスのチェックを外す。
TDD のサイクルを回す
TDD のサイクルを回すうえで、Jest の watch mode を使います。Jest がコードの変更を検知して、即座にフィードバックをくれます。
npx jest --watch --verbose
書き出した仕様の中から、着手するテストを選びます。最初のテストは工程が重くなるので、簡単かつアプリのコアに近い機能 (そのテストが通らなければ、他のテストも通らないようなもの) が良さそうです。"初期化" の上から順に進めることにしました。
最初のテスト
まずは最初の一歩として、jsdom 上でコンポーネントがレンダリングされるところを目指します。この時点でコンポーネントの名前とフォルダー構成を決める必要があるため、components/Todos/index.tsx とそれに対応するテストを作りました。
import Todos from '.';
import { render } from '@testing-library/react';

describe('Todos', () => {
  describe('初期化', () => {
    test('todo を追加するテキストボックスとボタンを表示する。', () => {
      render(<Todos />);
    });
    test.todo('エンプティステートを表示する。');
  });
});
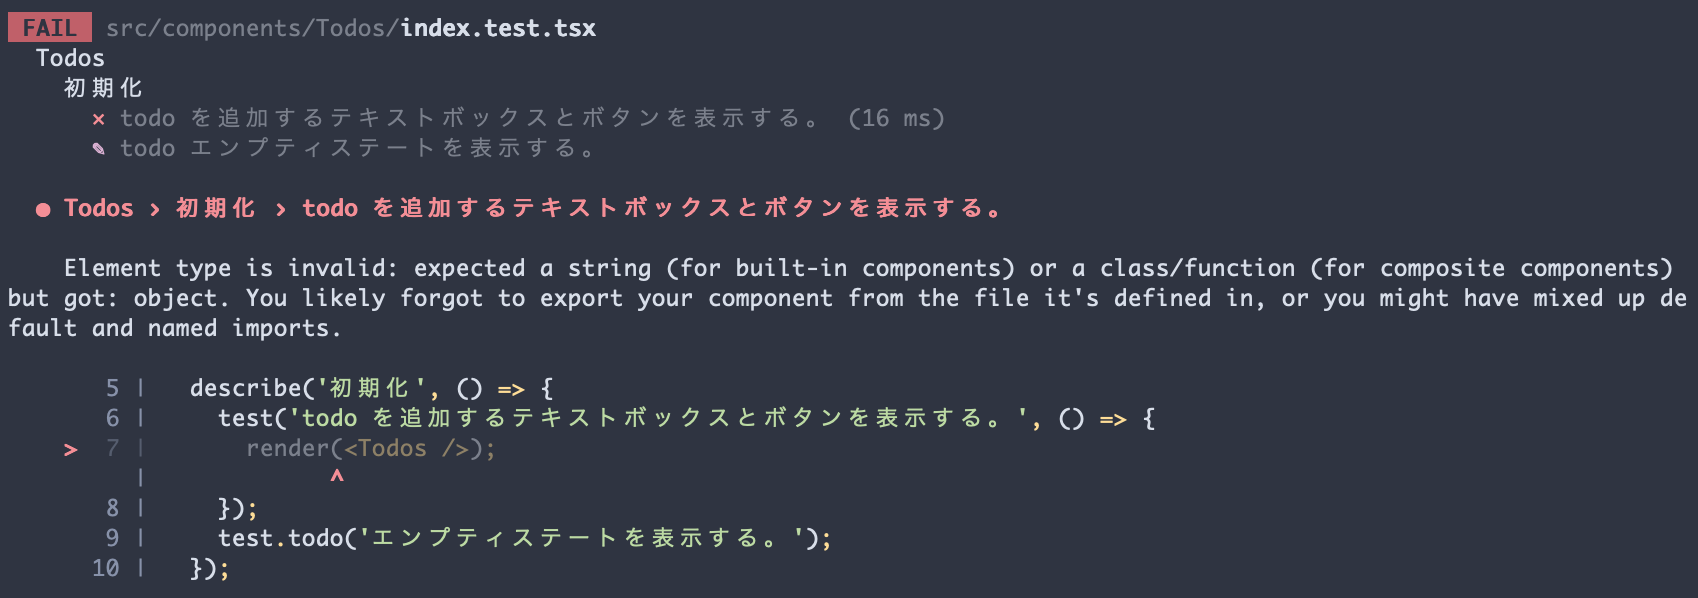
テスト対象のコンポーネント components/Todos/index.tsx はまだ空ファイルなので、当然テストが通りません。これは想定された失敗であり、何らかの JSX をエクスポートしてあげれば解消できそうです。
const Todos = () => {
  return <div>TODO</div>;
};

export default Todos;

テストが通ったのでリファクタリングできる箇所がないか、実装コードとテストを確認します。特になかったのでスキップします 🙈
直前のサイクルを通じて、Jest がコンポーネントに対するテストの失敗と成功を検知できていることがわかりました。足場が固まったので、次は安心して中身のあるテストを書けそうです。
 import Todos from '.';
-import { render } from '@testing-library/react';
+import { render, screen } from '@testing-library/react';

 describe('Todos', () => {
   describe('初期化', () => {
     test('todo を追加するテキストボックスとボタンを表示する。', () => {
       render(<Todos />);
+
+      const input = screen.getByPlaceholderText('New todo');
+
+      expect(input).toBeInTheDocument();
     });
     test.todo('エンプティステートを表示する。');
   });

これも想定通りの失敗です。input を追加してテストを通します。
 const Todos = () => {
-  return <div>TODO</div>;
+  return <input type="text" placeholder="New todo" />;
 };

 export default Todos;
リファクタリングできる箇所を考えます。アクセシビリティツリーを確認するため logRoles でデバッグしてみると、input にアクセシブルな名前が付与されていないことがわかりました。

TDD におけるリファクタリングとは、テストを成功させたまま実装コードを改善することです。input にアクセシブルな名前をつけると、より優先度の高いクエリである getByRole を使用できるので、横着せずに Red に戻って失敗するテストを書くことにしましょう。
     test('todo を追加するテキストボックスとボタンを表示する。', () => {
       render(<Todos />);

-      const input = screen.getByPlaceholderText('New todo');
+      const input = screen.getByRole('textbox', { name: 'todo-title' });

       expect(input).toBeInTheDocument();
     });
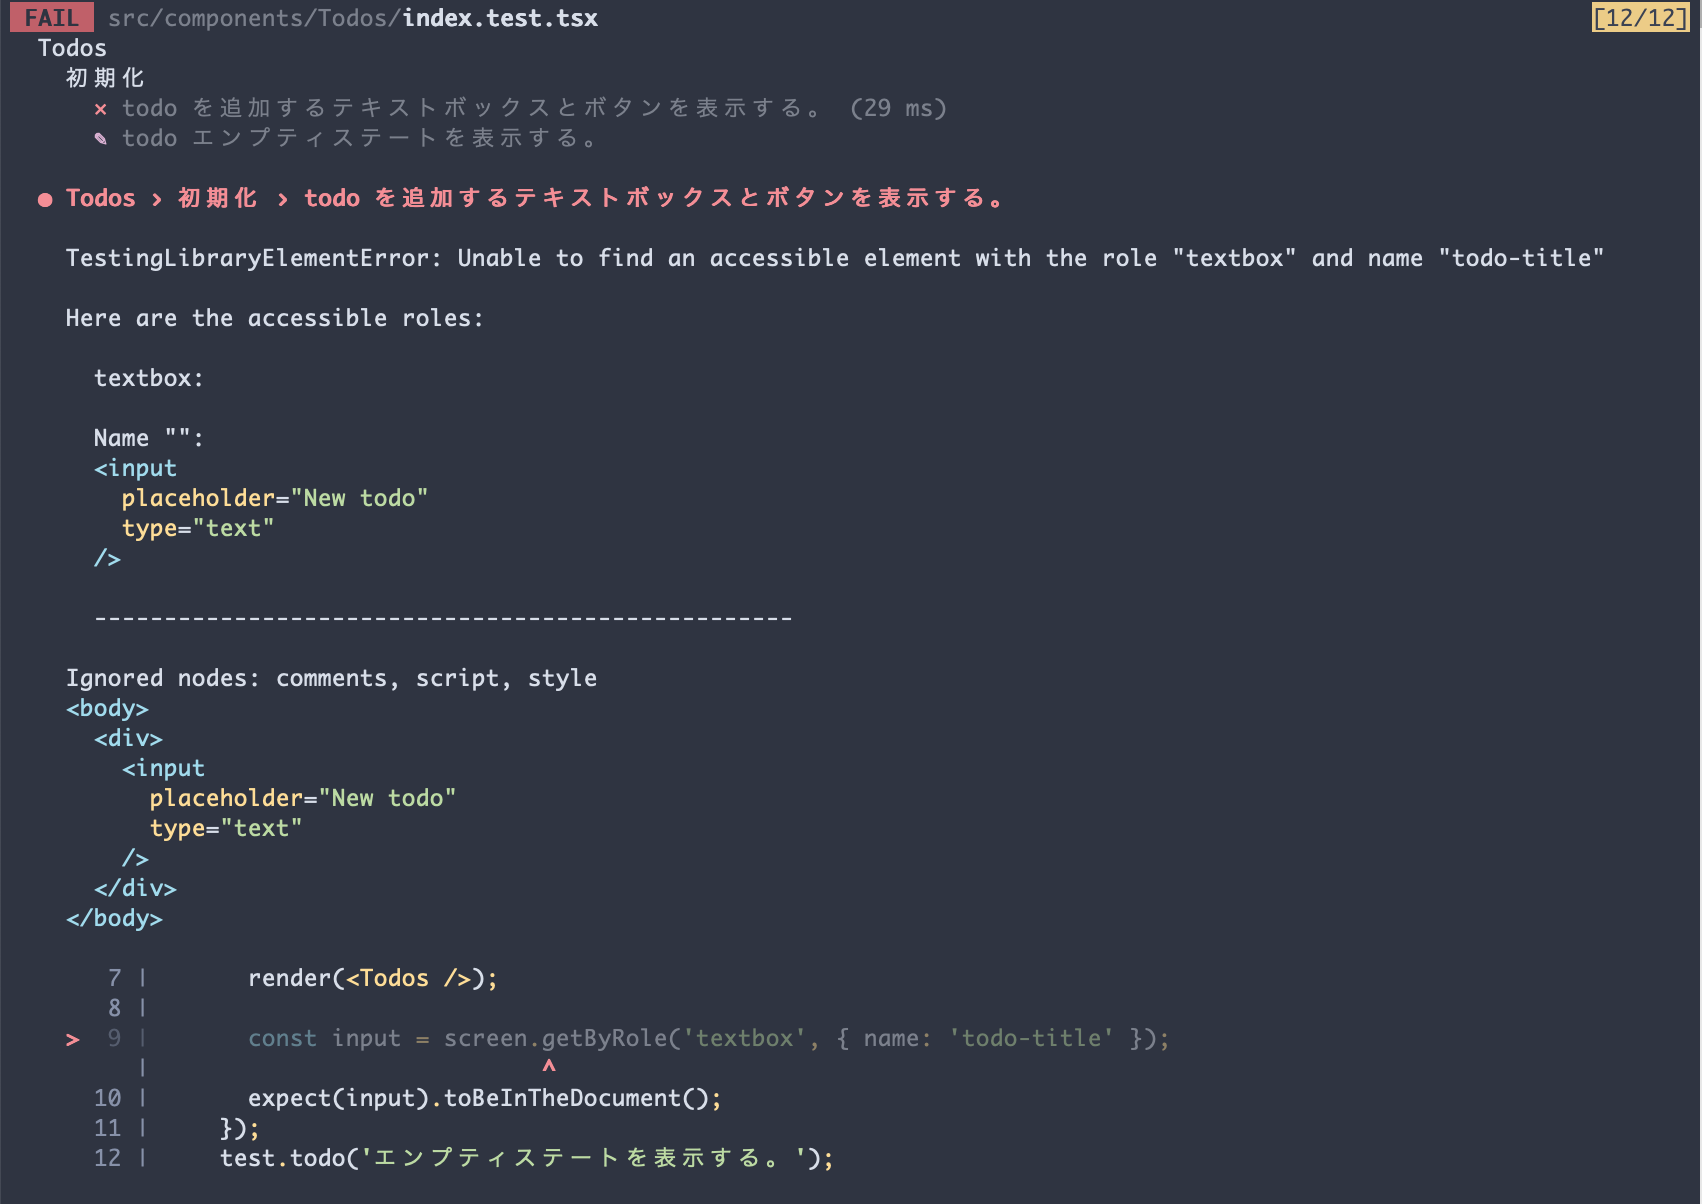
input に aria-label でアクセシブルな名前を付与することで、テストを通します。
 const Todos = () => {
-  return <div>TODO</div>;
+  return <input type="text" placeholder="New todo" aria-label="todo-title" />;
 };

 export default Todos;

続いて todo を追加するためのボタンを用意します。直前のサイクルとやることが似ているため、少し歩幅を広げて Red から Green まで一気にやってしまいます。
       render(<Todos />);

       const input = screen.getByRole('textbox', { name: 'todo-title' });
+      const addButton = screen.getByRole('button', { name: 'Add' });

       expect(input).toBeInTheDocument();
+      expect(addButton).toBeInTheDocument();
     });
     test.todo('エンプティステートを表示する。');
   });
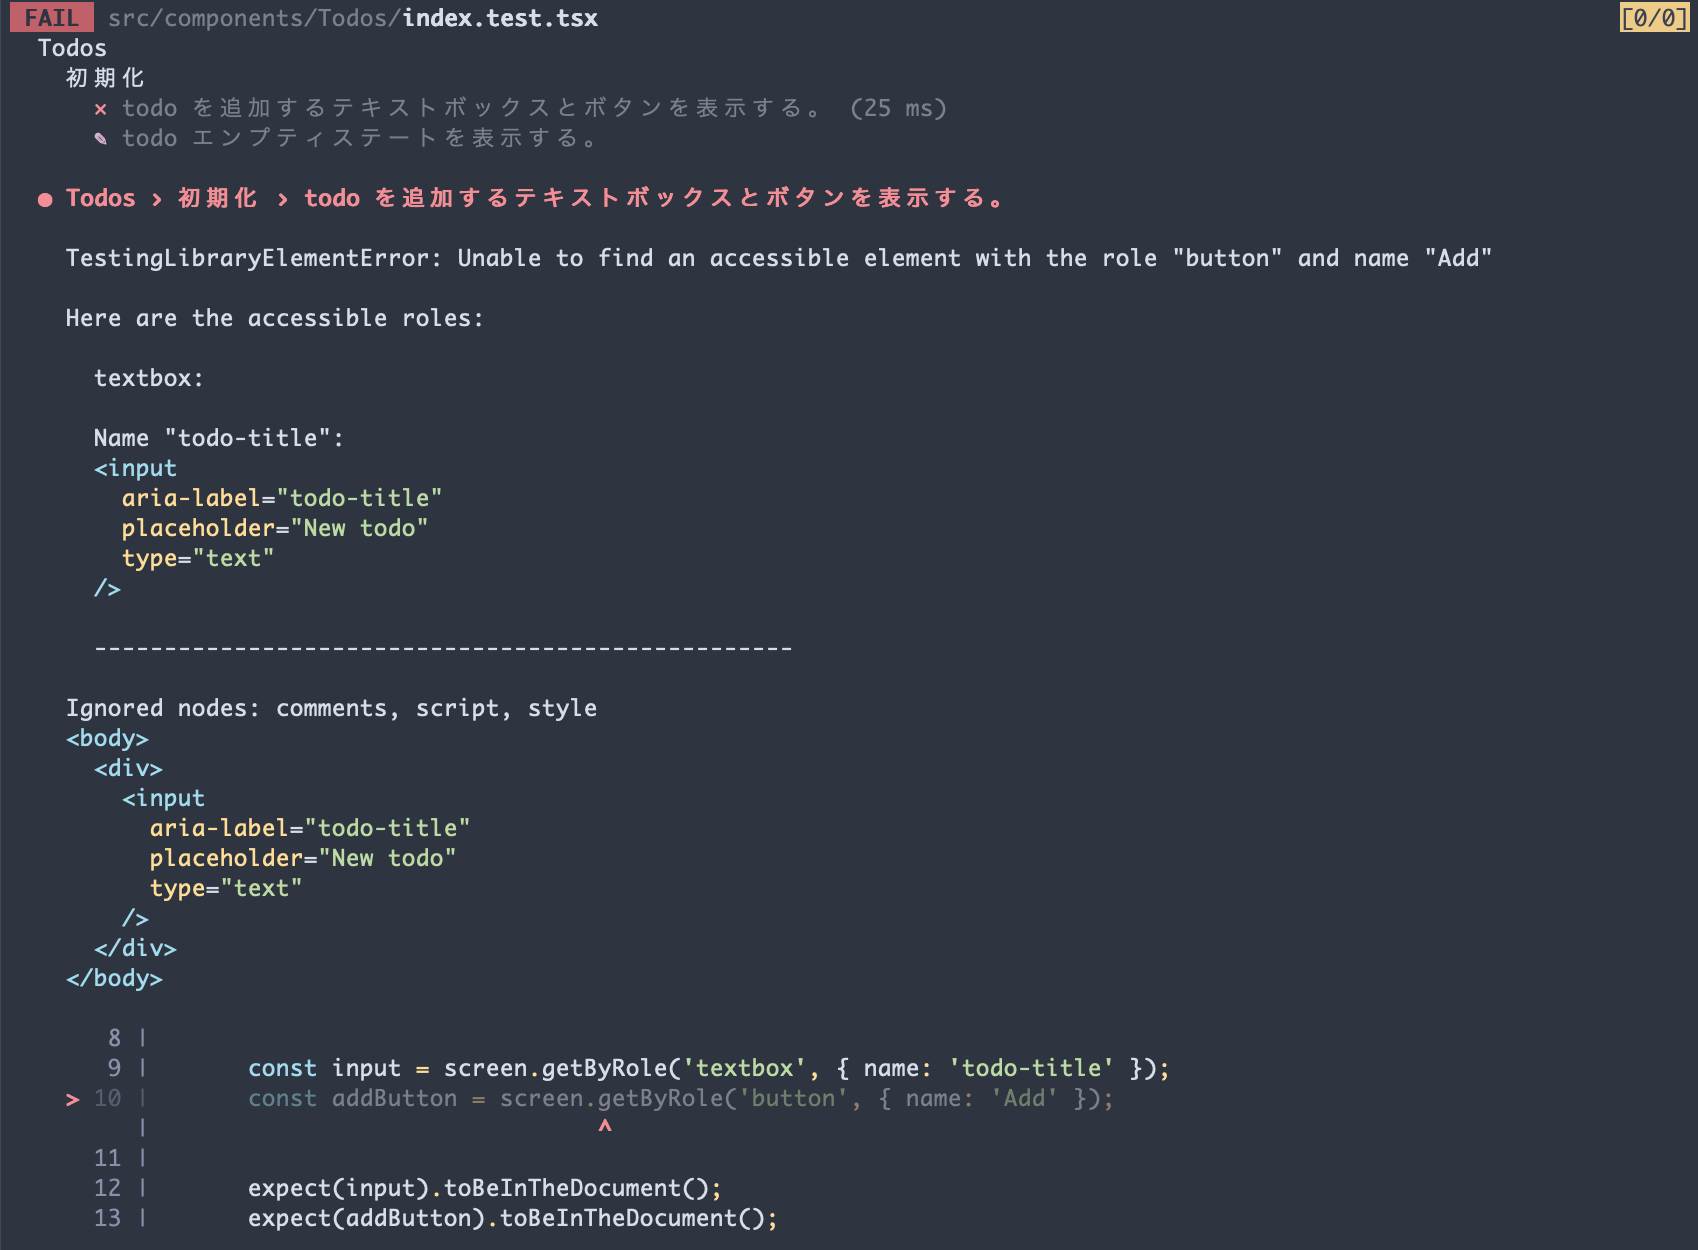
 const Todos = () => {
-  return <input type="text" placeholder="New todo" aria-label="todo-title" />;
+  return (
+    <div>
+      <input type="text" placeholder="New todo" aria-label="todo-title" />;
+      <button type="button">Add</button>
+    </div>
+  );
 };

 export default Todos;
これで最初のテストが完了しました!
仮実装
次のテストに進むわけですが、ここで手が止まってしまいます。仕様を洗い出したときには、エンプティステートとして何を表示するか明確にしていませんでした。仕様からは読み取れない暗黙の部分を考えて、テストとして表現します。
       expect(input).toBeInTheDocument();
       expect(addButton).toBeInTheDocument();
     });
-    test.todo('エンプティステートを表示する。');
+    test('エンプティステートを表示する。', () => {
+      render(<Todos />);
+
+      const emptyState = screen.getByText('No todos');
+
+      expect(emptyState).toBeInTheDocument();
+    });
   });
 });
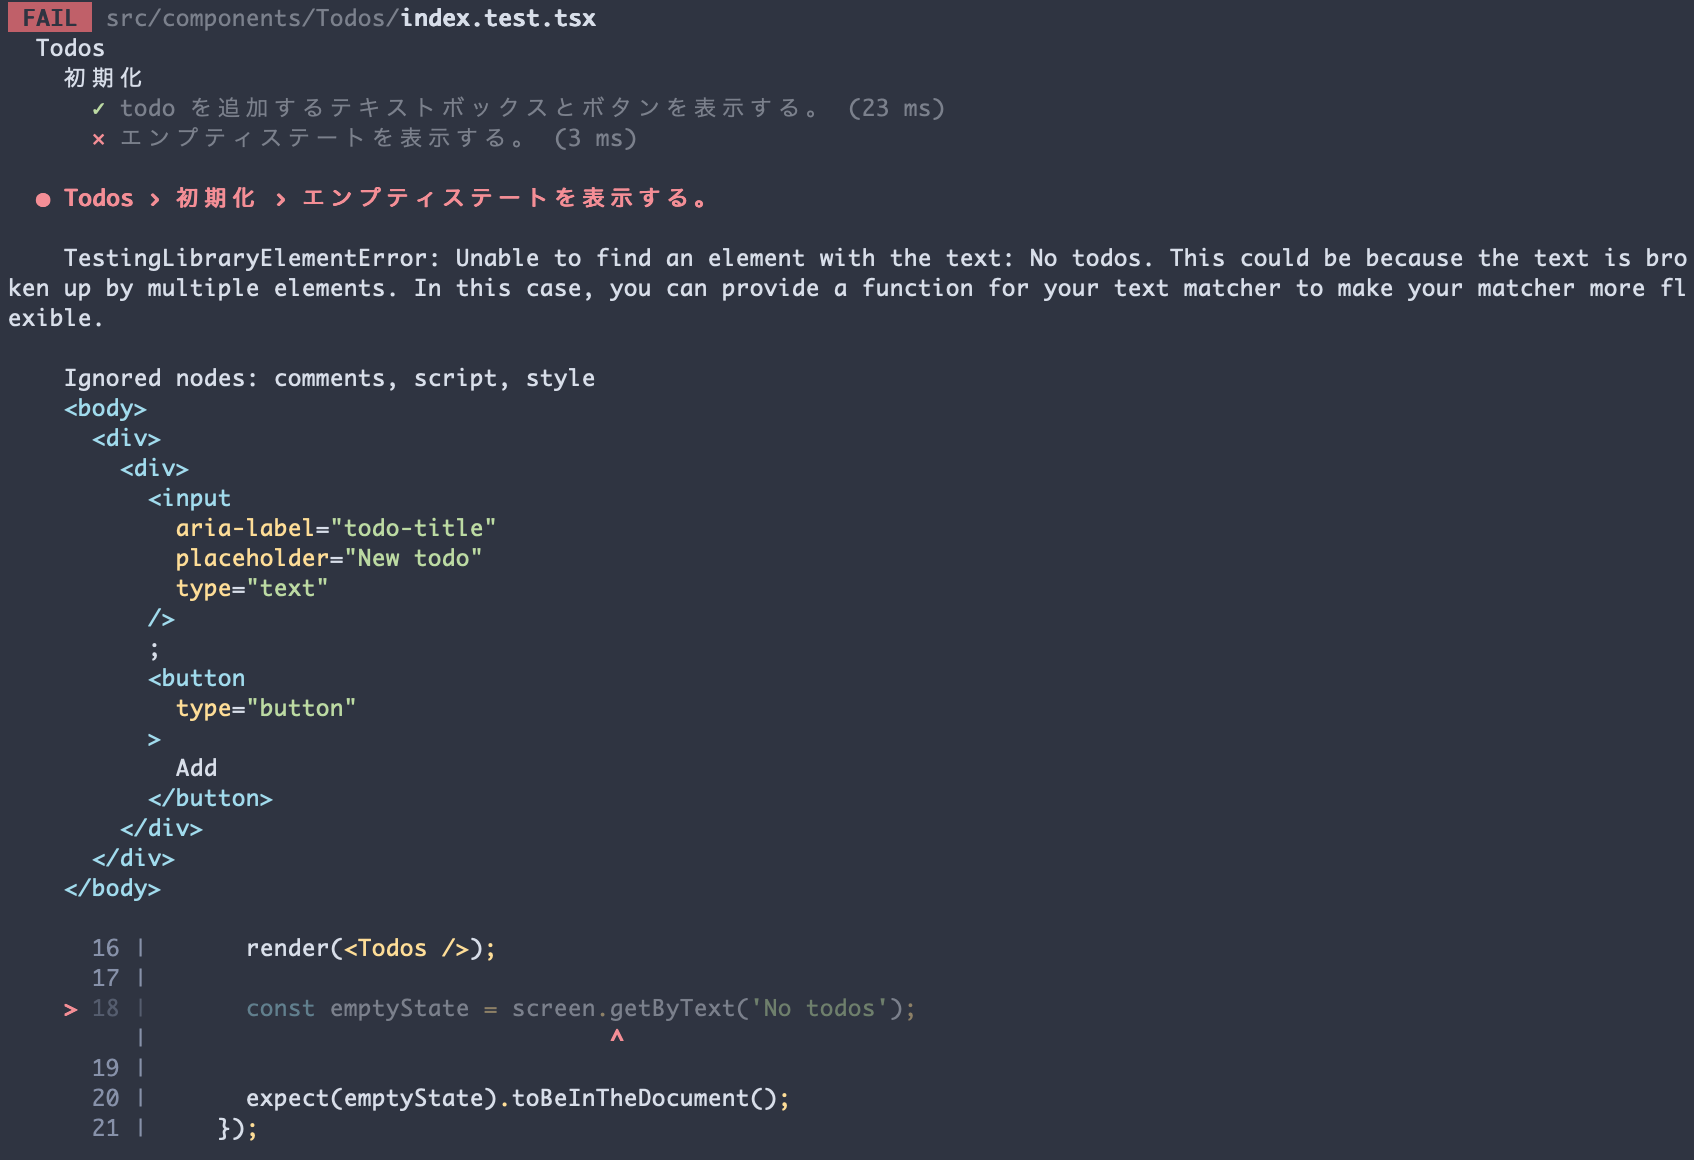
エンプティステートは todo が存在しないときにだけ表示されるべきです。しかし、非表示化を考える前に todo の追加を実装する必要があります。ここは直前に決めた No todos を含む要素を追加して、最短でテストを通すことにしましょう。
     <div>
       <input type="text" placeholder="New todo" aria-label="todo-title" />;
       <button type="button">Add</button>
+      <div>No todos</div>
     </div>
   );
 };

状態に応じたエンプティステートの表示/非表示は、仕様の考慮漏れです。リストに追加してテストの網羅性を向上させます。
  - todo の追加
+   - todo が追加されたら、エンプティステートを非表示にする。
  - todo の削除
+   - todo が削除されてリストが空になったら、エンプティーステートを表示する。
今回のような、実装方法が思いつかなくてもテストを通す手法を仮実装といいます。TDD は分割統治が基本であるため、課題は 1 つずつ解消するように意識します。すぐにコードを変更することになりますが、これも大きな一歩です。
不足している観点が見つかる
次の目標は "todo の追加" とします。
     describe('Todos', () => {
       expect(emptyState).toBeInTheDocument();
     });
   });
+
+  describe('todo の追加', () => {
+    test.todo('入力された文字列をテキストボックスに表示する。');
+    test.todo('Add ボタンが押されたら、todo をリストの最後に追加する。');
+    test.todo(
+      'テキストボックスが空の状態で Add ボタンが押されたら、アラートを表示する。',
+    );
+    test.todo('todo が追加されたら、エンプティステートを非表示にする。');
+  });
 });
取り掛かりとしては、テキストボックスの入力をチェックするのが良さそうです。@testing-library/user-event を使って、ユーザーの操作を擬似的に再現するテストを書きます。
 import Todos from '.';
 import { screen, render } from '@testing-library/react';
+import userEvent from '@testing-library/user-event';

 describe('Todos', () => {
   describe('初期化', () => {
@@ -21,7 +22,17 @@
     });
   });
   describe('todo の追加', () => {
-    test.todo('入力された文字列をテキストボックスに表示する。');
+    test('入力された文字列をテキストボックスに表示する。', async () => {
+      const user = userEvent.setup();
+      render(<Todos />);
+
+      const input = screen.getByRole('textbox', { name: 'todo-title' });
+
+      await user.clear(input);
+      await user.type(input, 'todo');
+
+      expect(input).toHaveValue('todo');
+    });
     test.todo('Add ボタンが押されたら、todo をリストの最後に追加する。');
     test.todo(
       'テキストボックスが空の状態で Add ボタンが押されたら、アラートを表示する。',

今のところ input の値を HTML で制御しているため、コンポーネントに変更を加えずともテストが通っていました。他の HTML 要素から input の値を取得するには、React で状態を制御する controlled component に変更する必要があります。しかし、あくまで 「Red / Green / Refactor」の順番を守るのが TDD なので、失敗するテストを先に書きます。
⚠️ 尺の都合上、todo の追加・削除・更新には出来合いのコードを使わせてもらいます。
export type Todo = {
  id: string;
  title: string;
  isCompleted: boolean;
};
import type { Todo } from '@/types/Todo';

export const actions = {
  added: 'todos/added',
  removed: 'todos/removed',
  updated: 'todos/updated',
} as const;

// action type
export type Action =
  | {
      type: typeof actions.added;
      payload: Pick<Todo, 'title'>;
    }
  | {
      type: typeof actions.removed;
      payload: Pick<Todo, 'id'>;
    }
  | {
      type: typeof actions.updated;
      payload: { todo: Todo };
    };

// action creators
export const add = (title: string): Action => ({
  type: actions.added,
  payload: { title },
});

export const remove = (id: string): Action => ({
  type: actions.removed,
  payload: { id },
});

export const update = (todo: Todo): Action => ({
  type: actions.updated,
  payload: { todo },
});
import { actions } from './actions';
import { v4 as uuidv4 } from 'uuid';

import type { Action } from './actions';
import type { Todo } from '@/types/Todo';

export const reducer = (todos: Todo[], action: Action) => {
  switch (action.type) {
    case actions.added: {
      const newTodo = {
        id: uuidv4(),
        title: action.payload.title,
        isCompleted: false,
      };

      return todos.concat([newTodo]);
    }
    case actions.removed: {
      return todos.filter((todo) => todo.id !== action.payload.id);
    }
    case actions.updated: {
      return todos.map((todo) =>
        todo.id === action.payload.todo.id ? action.payload.todo : todo,
      );
    }
    default: {
      const _check: never = action;

      return [];
    }
  }
};
       expect(input).toHaveValue('todo');
     });
-    test.todo('Add ボタンが押されたら、todo をリストの最後に追加する。');
+    test('Add ボタンが押されたら、todo をリストの最後に追加する。', async () => {
+      const user = userEvent.setup();
+      render(<Todos />);
+
+      const input = screen.getByRole('textbox', { name: 'todo-title' });
+      const addButton = screen.getByRole('button', { name: 'Add' });
+
+      // ボタンを押す前は todo が表示されていない。
+      expect(screen.queryByText('first todo')).not.toBeInTheDocument();
+      expect(screen.queryByText('second todo')).not.toBeInTheDocument();
+
+      // todo を 2 つ追加する。
+      await user.clear(input);
+      await user.type(input, 'first todo');
+      await user.click(addButton);
+      await user.clear(input);
+      await user.type(input, 'second todo');
+      await user.click(addButton);
+
+      // 追加した todo が表示されている。
+      expect(screen.getByText('first todo')).toBeInTheDocument();
+      expect(screen.getByText('second todo')).toBeInTheDocument();
     test.todo(
       'テキストボックスが空の状態で Add ボタンが押されたら、アラートを表示する。',
     );
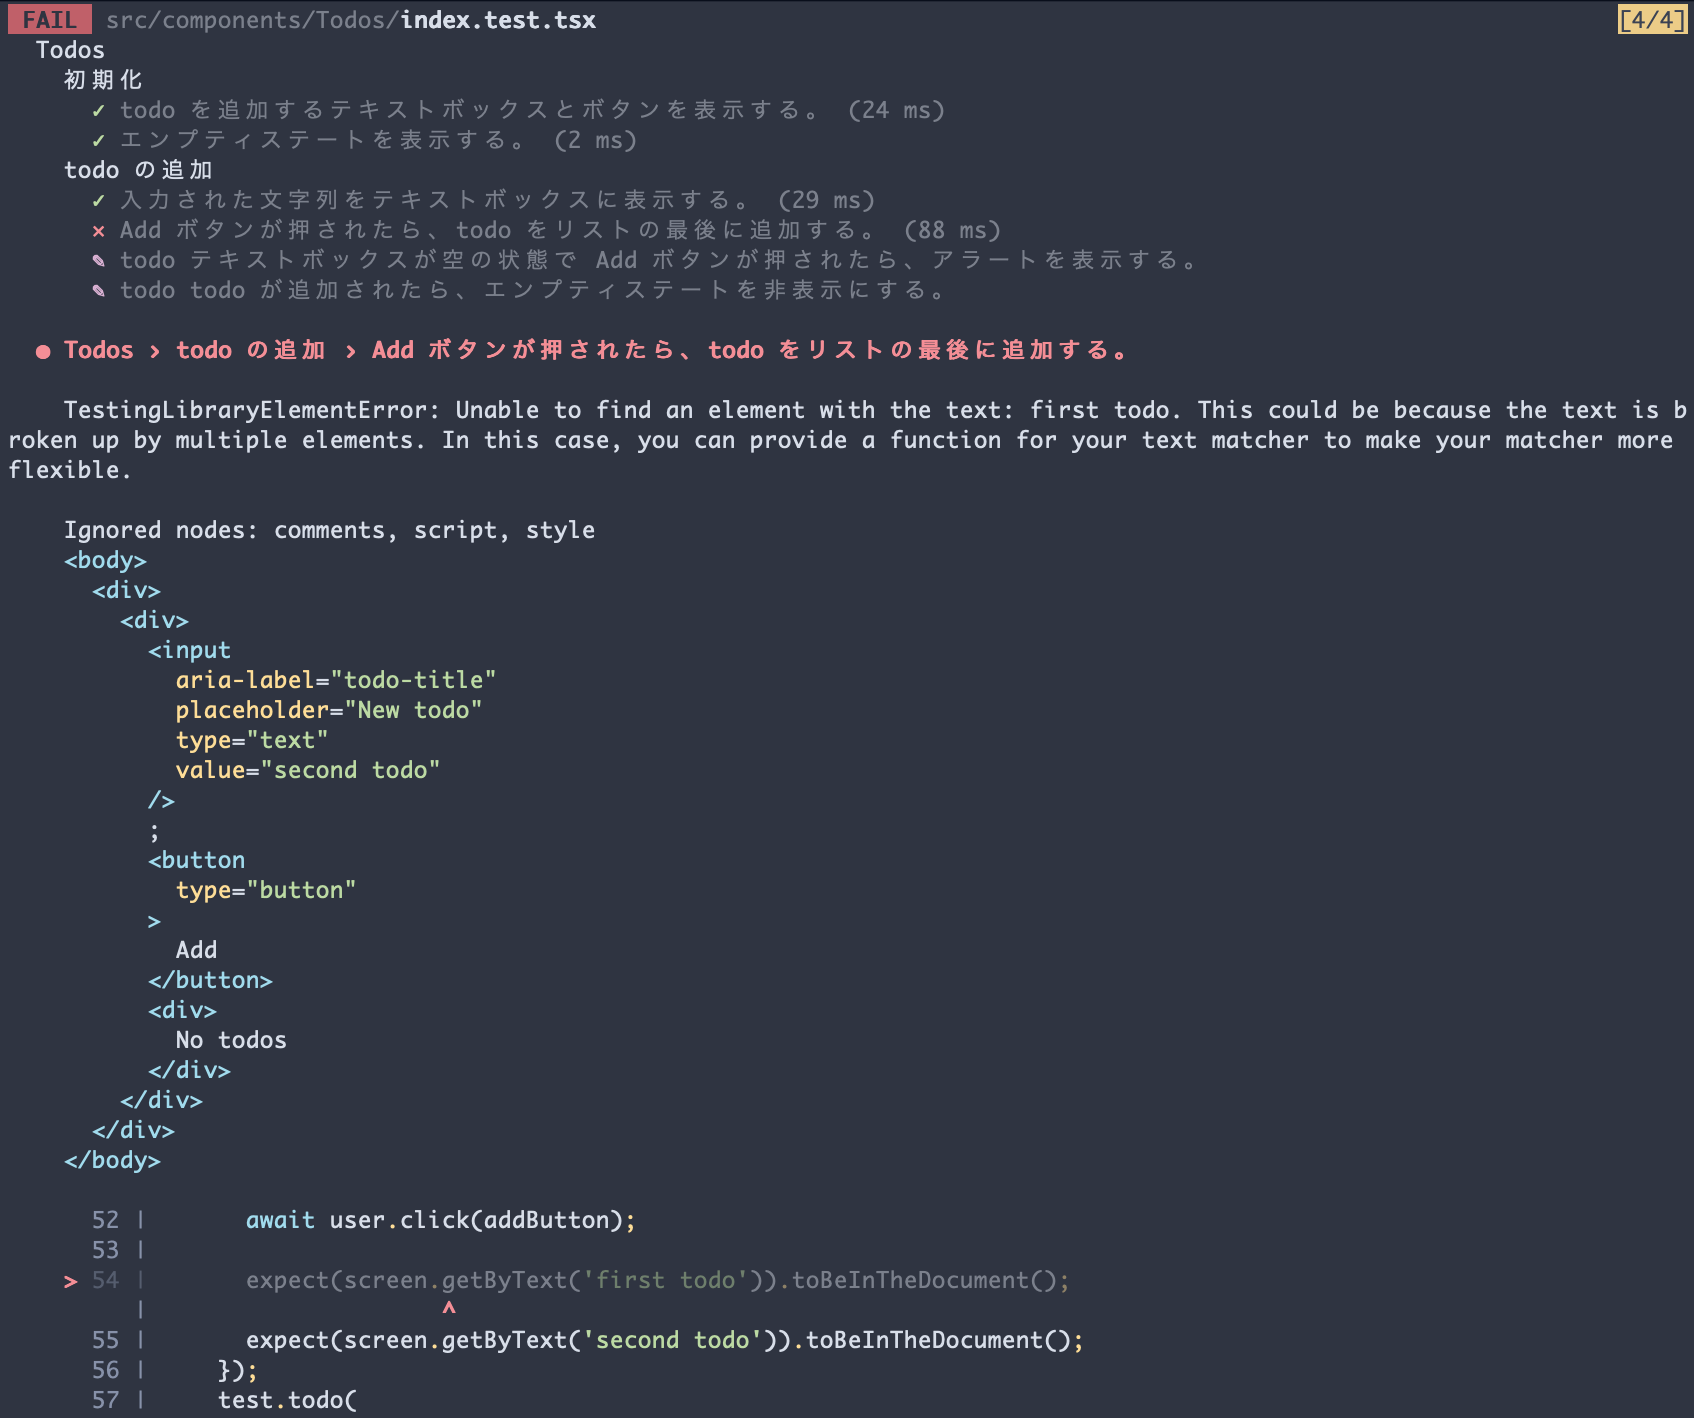
"入力された文字列をテキストボックスに表示する。" のテストが失敗しない限り、仕様を満たしていることを担保したまま実装を変更できます。
+import { useCallback, useState } from 'react';
+
 const Todos = () => {
+  const [inputValue, setInputValue] = useState('');
+
+  const handleInputValueChange = useCallback(
+    (e: React.ChangeEvent<HTMLInputElement>) => {
+      setInputValue(e.target.value);
+    },
+    [],
+  );
+
   return (
     <div>
-      <input type="text" placeholder="New todo" aria-label="todo-title" />;
-      <button type="button">Add</button>
+      <input
+        type="text"
+        placeholder="New todo"
+        aria-label="todo-title"
+        value={inputValue}
+        onChange={handleInputValueChange}
+      />
+      <button type="button">Add</button>
       <div>No todos</div>
     </div>
   );
これで todo 追加の実装を加える準備ができました。useReducer を使って todo の状態を管理します。
-import { useCallback, useState } from 'react';
+import { add } from '@/features/todos/actions';
+import { reducer } from '@/features/todos/reducer';
+import { useCallback, useReducer, useState } from 'react';

 const Todos = () => {
   const [inputValue, setInputValue] = useState('');
+  const [todos, dispatch] = useReducer(reducer, []);

   const handleInputValueChange = useCallback(
     (e: React.ChangeEvent<HTMLInputElement>) => {
     [],
   );

+  const handleAddButtonClick = useCallback(() => {
+    dispatch(add(inputValue));
+  }, [inputValue]);
+
   return (
     <div>
       <input
         value={inputValue}
         onChange={handleInputValueChange}
       />
-      <button type="button">Add</button>
+      <button type="button" onClick={handleAddButtonClick}>
+        Add
+      </button>
       <div>No todos</div>
+      {
+        <ul>
+          {todos.map((todo) => (
+            <li key={todo.id}>{todo.title}</li>
+          ))}
+        </ul>
+      }
     </div>
   );
 };

テストにリファクタリングの余地がありそうです。アサーションの期待値を厳密にチェックします。
 import Todos from '.';
-import { render, screen } from '@testing-library/react';
+import { render, screen, within } from '@testing-library/react';
 import userEvent from '@testing-library/user-event';

 describe('Todos', () => {
       const input = screen.getByRole('textbox', { name: 'todo-title' });
       const addButton = screen.getByRole('button', { name: 'Add' });

-      expect(screen.queryByText('first todo')).not.toBeInTheDocument();
-      expect(screen.queryByText('second todo')).not.toBeInTheDocument();
+      const list = screen.getByRole('list');
+      const initialTodos = within(list).queryAllByRole('listitem');
+      expect(initialTodos).toHaveLength(0);

       await user.clear(input);
       await user.type(input, 'first todo');
       await user.click(addButton);
       await user.clear(input);
       await user.type(input, 'second todo');
       await user.click(addButton);

-      expect(screen.getByText('first todo')).toBeInTheDocument();
-      expect(screen.getByText('second todo')).toBeInTheDocument();
+      const todos = within(list).queryAllByRole('listitem');
+      expect(todos).toHaveLength(2);
+      expect(todos[0]).toHaveTextContent('first todo');
+      expect(todos[1]).toHaveTextContent('second todo');
     });
     test.todo(
       'テキストボックスが空の状態で Add ボタンが押されたら、アラートを表示する。',
     );
正常系のテストが通ったので、続いて異常系のテストに進みます。
       // 追加した todo が表示されている。
       expect(screen.getByText('first todo')).toBeInTheDocument();
       expect(screen.getByText('second todo')).toBeInTheDocument();
     });
-    test.todo(
-      'テキストボックスが空の状態で Add ボタンが押されたら、アラートを表示する。',
-    );
+    test('テキストボックスが空の状態で Add ボタンが押されたら、アラートを表示する。', async () => {
+      const user = userEvent.setup();
+      render(<Todos />);
+
+      const addButton = screen.getByRole('button', { name: 'Add' });
+
+      expect(
+        screen.queryByText(/^please enter todo title\.$/i),
+      ).not.toBeInTheDocument();
+
+      await user.click(addButton);
+
+      expect(
+        screen.getByText(/^please enter todo title.$/i),
+      ).toBeInTheDocument();
+    });
     test.todo('todo が追加されたら、エンプティステートを非表示にする。');
   });
 });
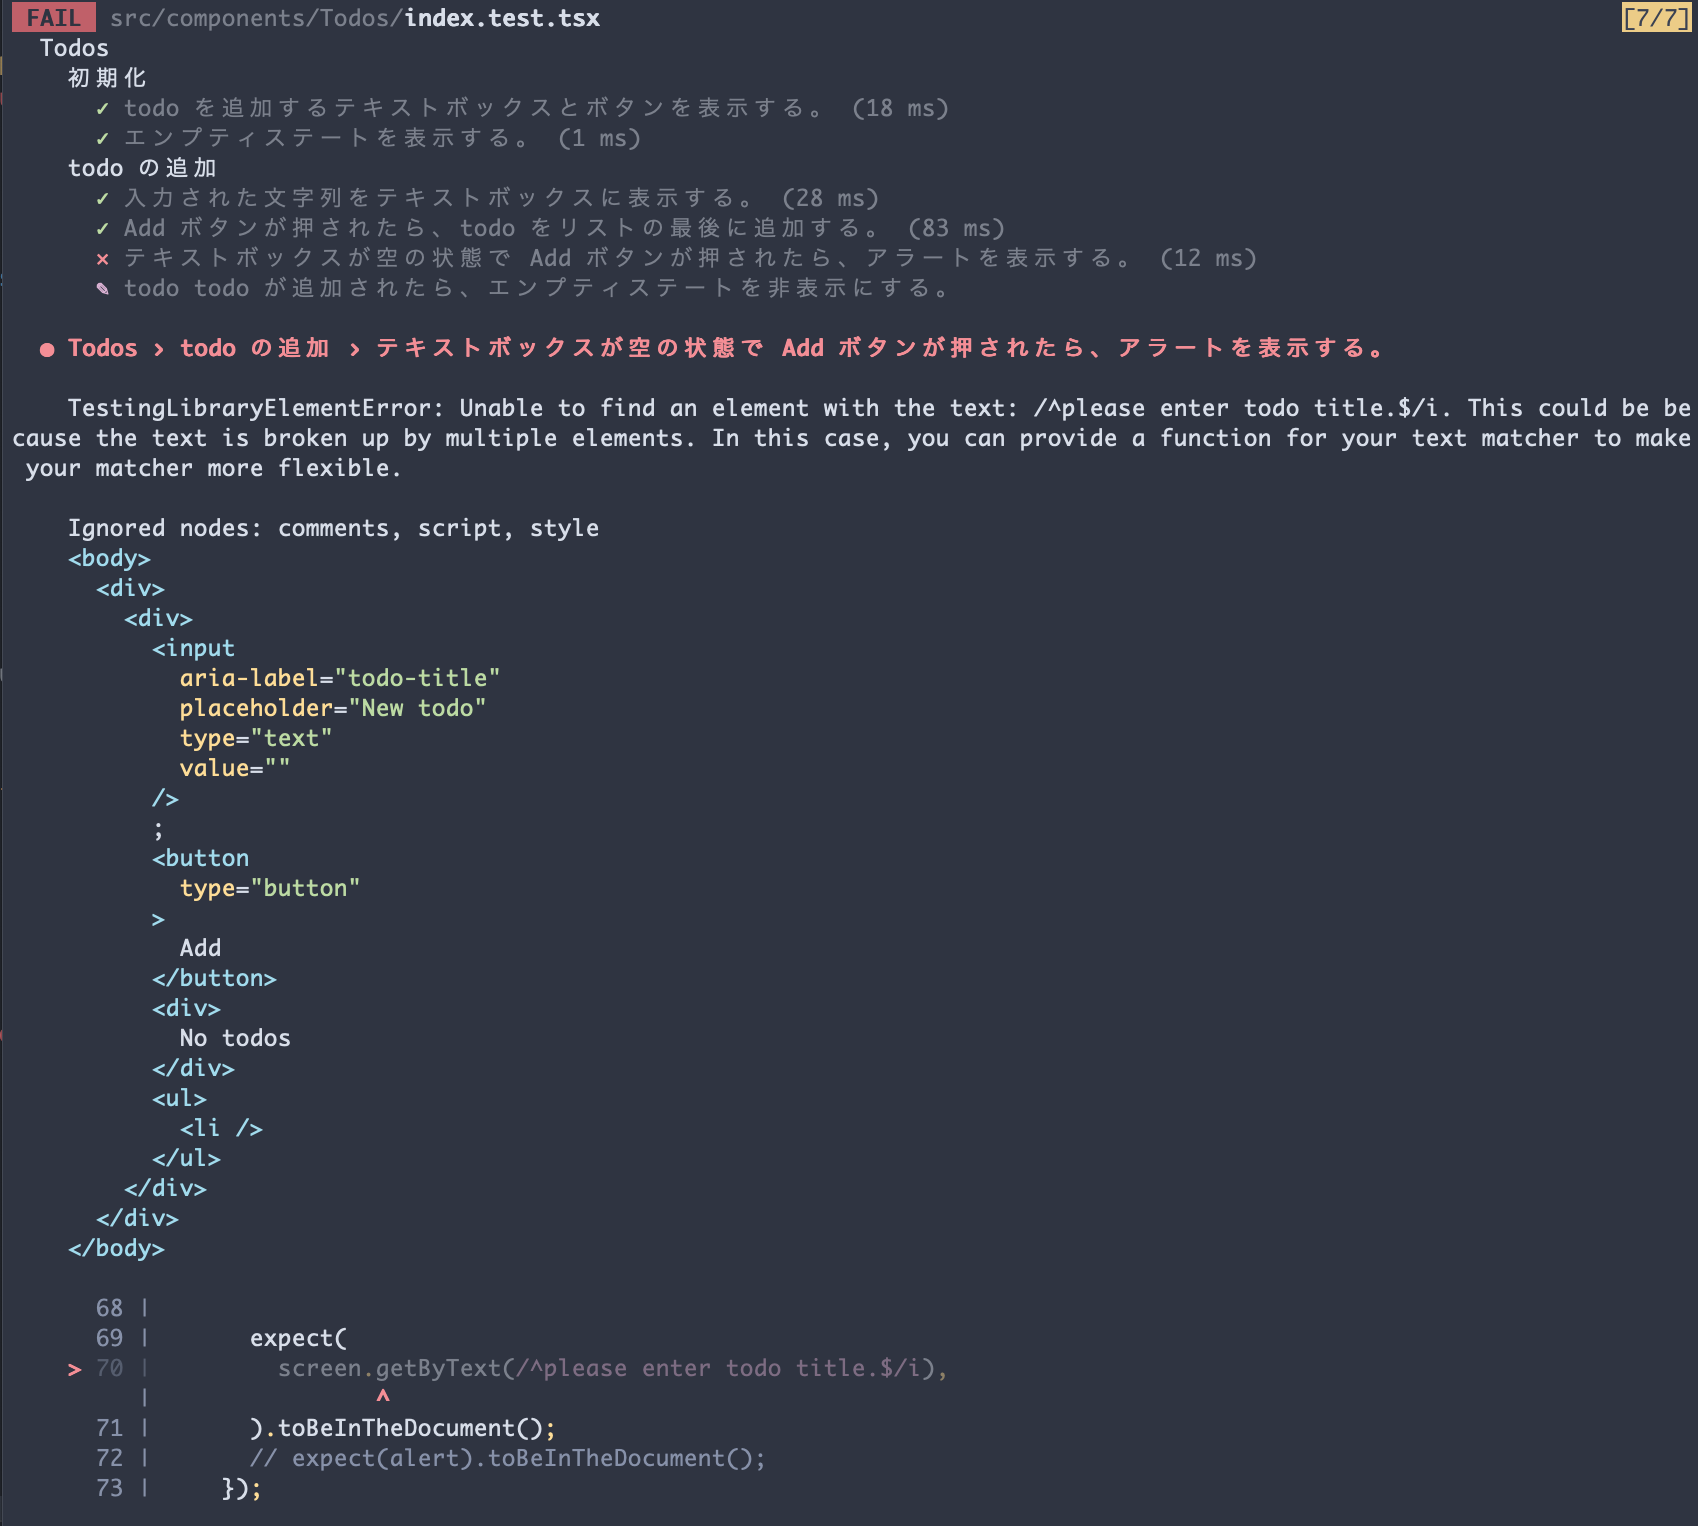
アラート表示を制御するための状態を追加します。
 import { useCallback, useReducer, useState } from 'react';

 const Todos = () => {
-  const [inputValue, setInputValue] = useState('');
+  const initialInputValue = '';
+  const [inputValue, setInputValue] = useState(initialInputValue);
+  const [shouldDisplayAlert, setShouldDisplayAlert] = useState(false);
   const [todos, dispatch] = useReducer(reducer, []);

   const handleInputValueChange = useCallback(
   );

   const handleAddButtonClick = useCallback(() => {
+    if (inputValue === initialInputValue) {
+      setShouldDisplayAlert(true);
+    }
+
     dispatch(add(inputValue));
   }, [inputValue]);

@@ -26,10 +32,10 @@
         value={inputValue}
         onChange={handleInputValueChange}
       />
       <button type="button" onClick={handleAddButtonClick}>
         Add
       </button>
+      {shouldDisplayAlert && <div role="alert">Please enter todo title.</div>}
       <div>No todos</div>
       {
         <ul>
テストは通りましたが、このままでは一度出したアラートが消えません。先ほどのエンプティステートもそうですが、状態に応じた UI の変化に意識が向かないようです。TDD ではこういったコーディングの癖や傾向に気づくこともあります。設計に不足しがちな観点がわかっていれば、意識的に補うことができるはずです。
   - 入力された文字列をテキストボックスに表示する。
   - Add ボタンが押されたら、todo をリストの最後に追加する。
   - テキストボックスが空の状態で Add ボタンが押されたら、アラートを表示する。
+  - テキストボックスに何らかの入力があれば、アラートを非表示にする。
   - todo が追加されたら、エンプティステートを非表示にする。
 - todo の削除
   - Delete ボタンが押された todo を削除する。
自然と美しいコードに近づく
失敗するテストを追加して...
         screen.getByText(/^please enter todo title.$/i),
       ).toBeInTheDocument();
     });
+    test('テキストボックスに何らかの入力があれば、アラートを非表示にする。', async () => {
+      const user = userEvent.setup();
+      render(<Todos />);
+
+      const addButton = screen.getByRole('button', { name: 'Add' });
+
+      expect(
+        screen.queryByText(/^please enter todo title\.$/i),
+      ).not.toBeInTheDocument();
+
+      await user.click(addButton);
+
+      expect(
+        screen.getByText(/^please enter todo title.$/i),
+      ).toBeInTheDocument();
+
+      const input = screen.getByRole('textbox', { name: 'todo-title' });
+      await user.clear(input);
+      await user.type(input, 'todo');
+      await user.click(addButton);
+
+      expect(
+        screen.queryByText(/^please enter todo title.$/i),
+      ).not.toBeInTheDocument();
+    });
     test.todo('todo が追加されたら、エンプティステートを非表示にする。');
   });
 });
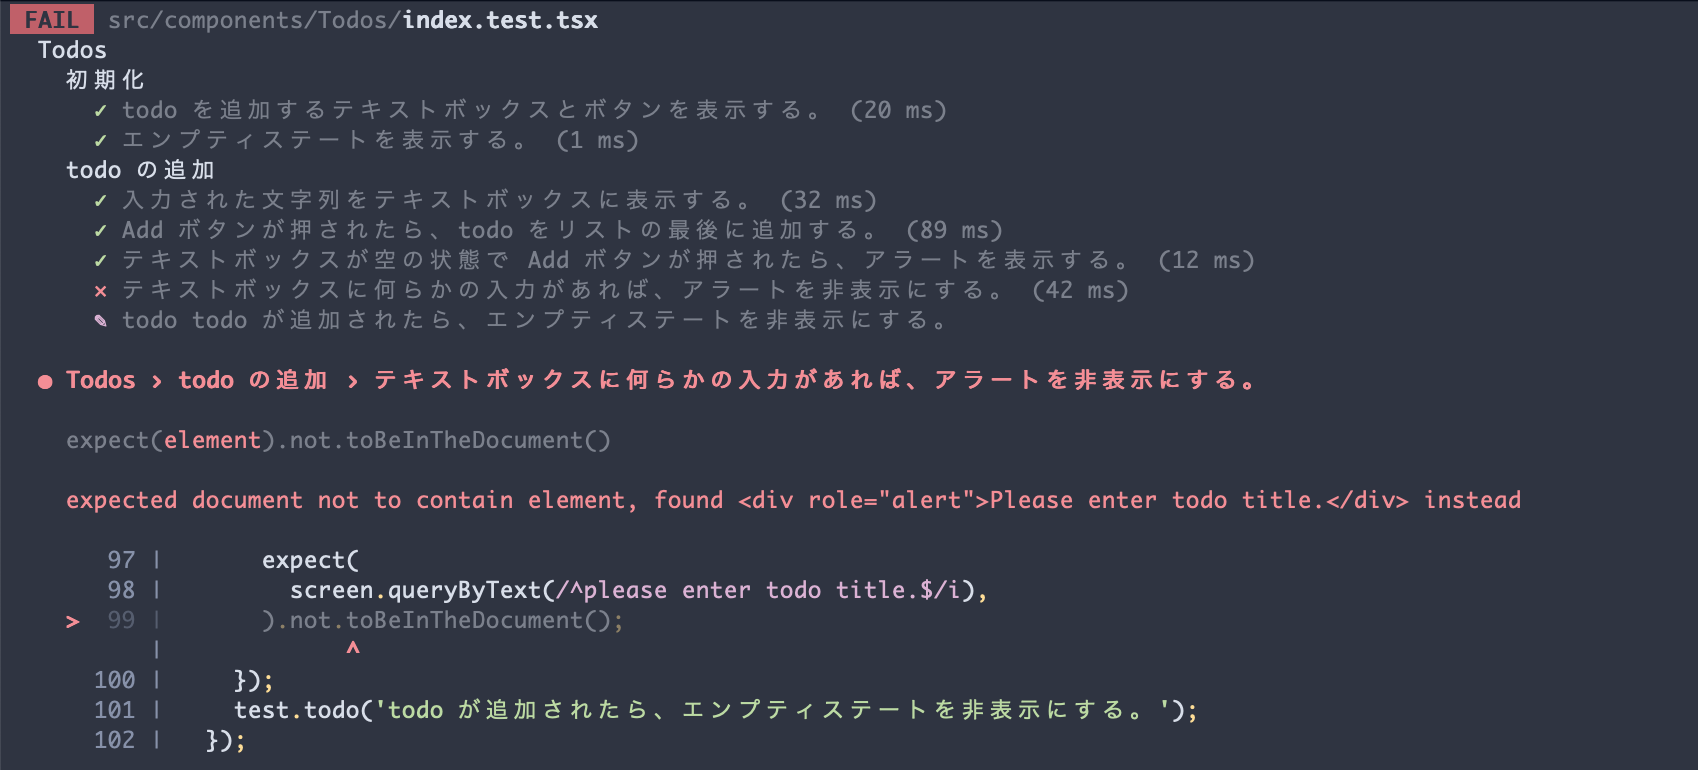
テストが通るように実装します。
@@ -10,9 +10,13 @@

   const handleInputValueChange = useCallback(
     (e: React.ChangeEvent<HTMLInputElement>) => {
+      if (shouldDisplayAlert) {
+        setShouldDisplayAlert(false);
+      }
+
       setInputValue(e.target.value);
     },
-    [],
+    [shouldDisplayAlert],
   );

   const handleAddButtonClick = useCallback(() => {

テスト内で同じ正規表現を何度も書いているのが気になります。Rule of Three の考え方に従って、重複を取り除きましょう。
@@ -78,24 +78,19 @@

       const addButton = screen.getByRole('button', { name: 'Add' });

-      expect(
-        screen.queryByText(/^please enter todo title\.$/i),
-      ).not.toBeInTheDocument();
+      const alertTextRegexp = /^please enter todo title\.$/i;
+      expect(screen.queryByText(alertTextRegexp)).not.toBeInTheDocument();

       await user.click(addButton);

-      expect(
-        screen.getByText(/^please enter todo title.$/i),
-      ).toBeInTheDocument();
+      expect(screen.getByText(alertTextRegexp)).toBeInTheDocument();

       const input = screen.getByRole('textbox', { name: 'todo-title' });
       await user.clear(input);
       await user.type(input, 'todo');
       await user.click(addButton);

-      expect(
-        screen.queryByText(/^please enter todo title.$/i),
-      ).not.toBeInTheDocument();
+      expect(screen.queryByText(alertTextRegexp)).not.toBeInTheDocument();
     });
     test.todo('todo が追加されたら、エンプティステートを非表示にする。');
   });
TDD ではリファクタリングがサイクルに組み込まれているため、自然とその機会が増えます。Red と Green でコードが動作することを保証したうえで、Refactor で美しいコードに近づけることができます。
最後に仮実装で留めていた "エンプティステートが表示され続ける問題" を修正します。
@@ -92,6 +92,18 @@

       expect(screen.queryByText(alertTextRegexp)).not.toBeInTheDocument();
     });
-    test.todo('todo が追加されたら、エンプティステートを非表示にする。');
+    test('todo が追加されたら、エンプティステートを非表示にする。', async () => {
+      const user = userEvent.setup();
+      render(<Todos />);
+
+      const input = screen.getByRole('textbox', { name: 'todo-title' });
+      const addButton = screen.getByRole('button', { name: 'Add' });
+
+      await user.clear(input);
+      await user.type(input, 'todo');
+      await user.click(addButton);
+
+      expect(screen.queryByText('No todos')).not.toBeInTheDocument();
+    });
   });
 });
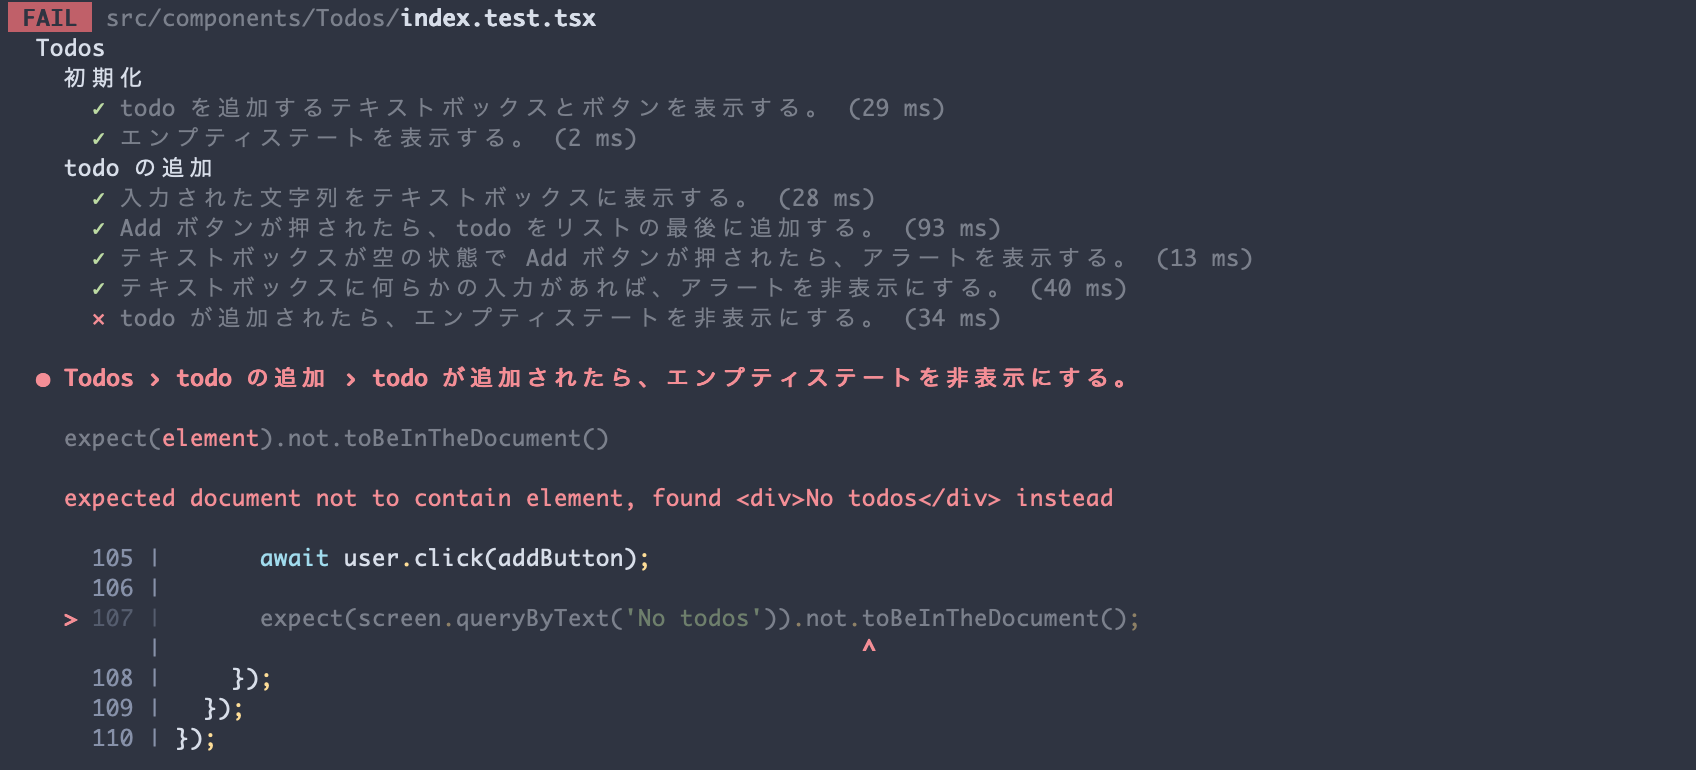
todo の状態をチェックして、エンプティステートを出し入れします。
@@ -8,6 +8,8 @@
   const [shouldDisplayAlert, setShouldDisplayAlert] = useState(false);
   const [todos, dispatch] = useReducer(reducer, []);

+  const emptyState = todos.length === 0 ? <div>No todos</div> : null;
+
   const handleInputValueChange = useCallback(
     (e: React.ChangeEvent<HTMLInputElement>) => {
       if (shouldDisplayAlert) {
@@ -40,7 +42,7 @@
         Add
       </button>
       {shouldDisplayAlert && <div role="alert">Please enter todo title.</div>}
-      <div>No todos</div>
+      {emptyState}
       {
         <ul>
           {todos.map((todo) => (

これで todo の追加が完了しました!
最終的なアプリの仕様
最終的には以下のような仕様になりました。未検討だったり、曖昧だったりした部分がクリアになったのがわかります。
   - 入力された文字列をテキストボックスに表示する。
   - Add ボタンが押されたら、todo をリストの最後に追加する。
   - テキストボックスが空の状態で Add ボタンが押されたら、アラートを表示する。
+  - テキストボックスに何らかの入力があれば、アラートを非表示にする。
+  - todo が追加されたら、エンプティステートを非表示にする。
+  - todo が追加されたら、テキストボックスの値をクリアする。
 - todo の削除
   - Delete ボタンが押された todo を削除する。
+  - todo が削除されてリストが空になったら、エンプティーステートを表示する。
 - todo の更新
   - 未完了の todo のチェックボックスが押されたら、そのチェックボックスのチェックを入れる。
   - 完了済みの todo のチェックボックスが押されたら、そのチェックボックスのチェックを外す。
おわりに
React コンポーネントの開発においても、TDD を実践することでそのメリットを十分に享受できると感じました。テストを書くことを前提とする場合、無理のない範囲で TDD のアプローチを採用してもよいかもしれません。このテーマについては継続して取り組み、もっと複雑なケースでどうなるのか試していこうと思います。